Any domain name can be pointed to a Ideal Directories website. You can use a custom domain like "yourname.com" or "yourname.net" for your site. This process may vary slightly depending on the domain registrar associated with the domain, and it's best to contact the domain registrar itself for further assistance.
Here's how to do it using CheapNEasyDomains.com as our example:
(Note: the instructions are very similar for GoDaddy as well)
STEP 1 - Purchase Domain Name
If you haven't done so already, purchase the domain name from a registrar such as CheapNEasyDomains.com, for example. This can be done for about $10/year.
STEP 2 - Locate Domain
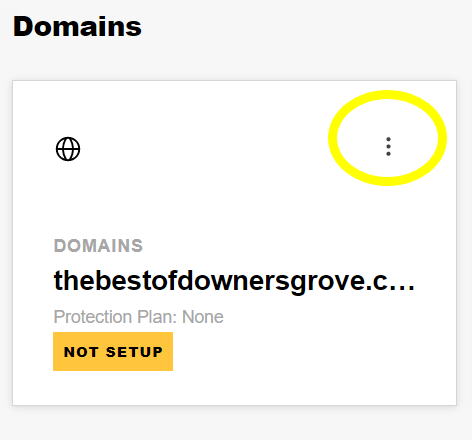
Log in to your account where you purchased the domain and locate the domain name that you want to connect to your Ideal Directories website under "Domains."
STEP 3 - Manage DNS
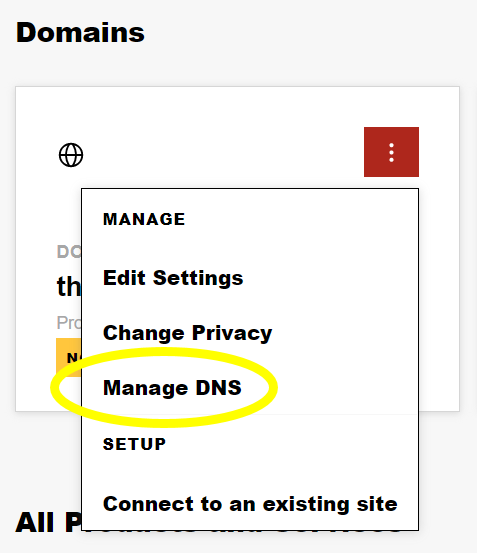
Click the icon in the top right next to the domain name that you want to connect, and click "Manage DNS".


STEP 4 - Find www CNAME Record
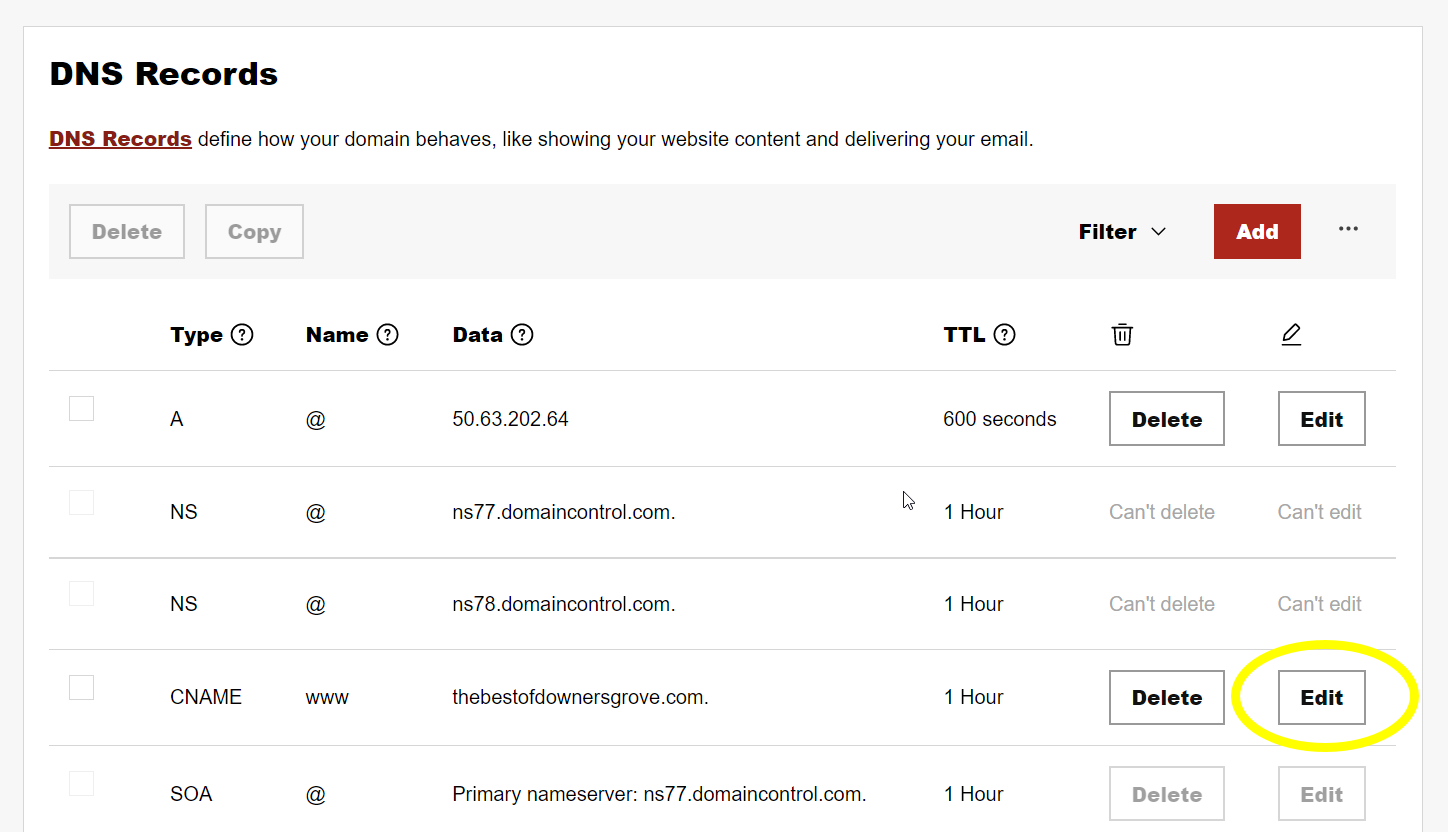
From the DNS Management page, click the "Edit Record" button (pencil icon) to change your CNAME Record on the line that reads "www" in the "Name" column.

STEP 5 - Change www CNAME Record
Change the "Value" to domain.idealdirectories.com and click "Save"
(Copy and paste, or type domain.idealdirectories.com - Do not use your actual domain name)

STEP 6 - Create or edit Two A Records
The next step is to add or modify the A Records. Two A Records are used for server balance and redundancy. This provides your site with a higher level of protection in the event of an outage.
First A Record
Create (or edit an existing) A Record for "@" (it might instead appear as the domain by itself, or "thebestofdownersgrove.com" in this example) and change the "Value" so it points to this IP Address: 3.211.5.124

Second A Record
Then, create (or edit an existing) additional A Record for "@" (again it might appear as the domain by itself), and change the "Value" so it points to this IP Address: 54.235.138.17

When done, you should have 2 A Records pointing to the root domain and should look something like this (all other Records that were there before can remain):

Please Note: Some domain hosts, like Google domains, will not let you have more than 1 record for the @ domain. If this is the case, then just add a 2nd IP address for that 1 record.

STEP 7 - Click on General Settings in the Dashboard
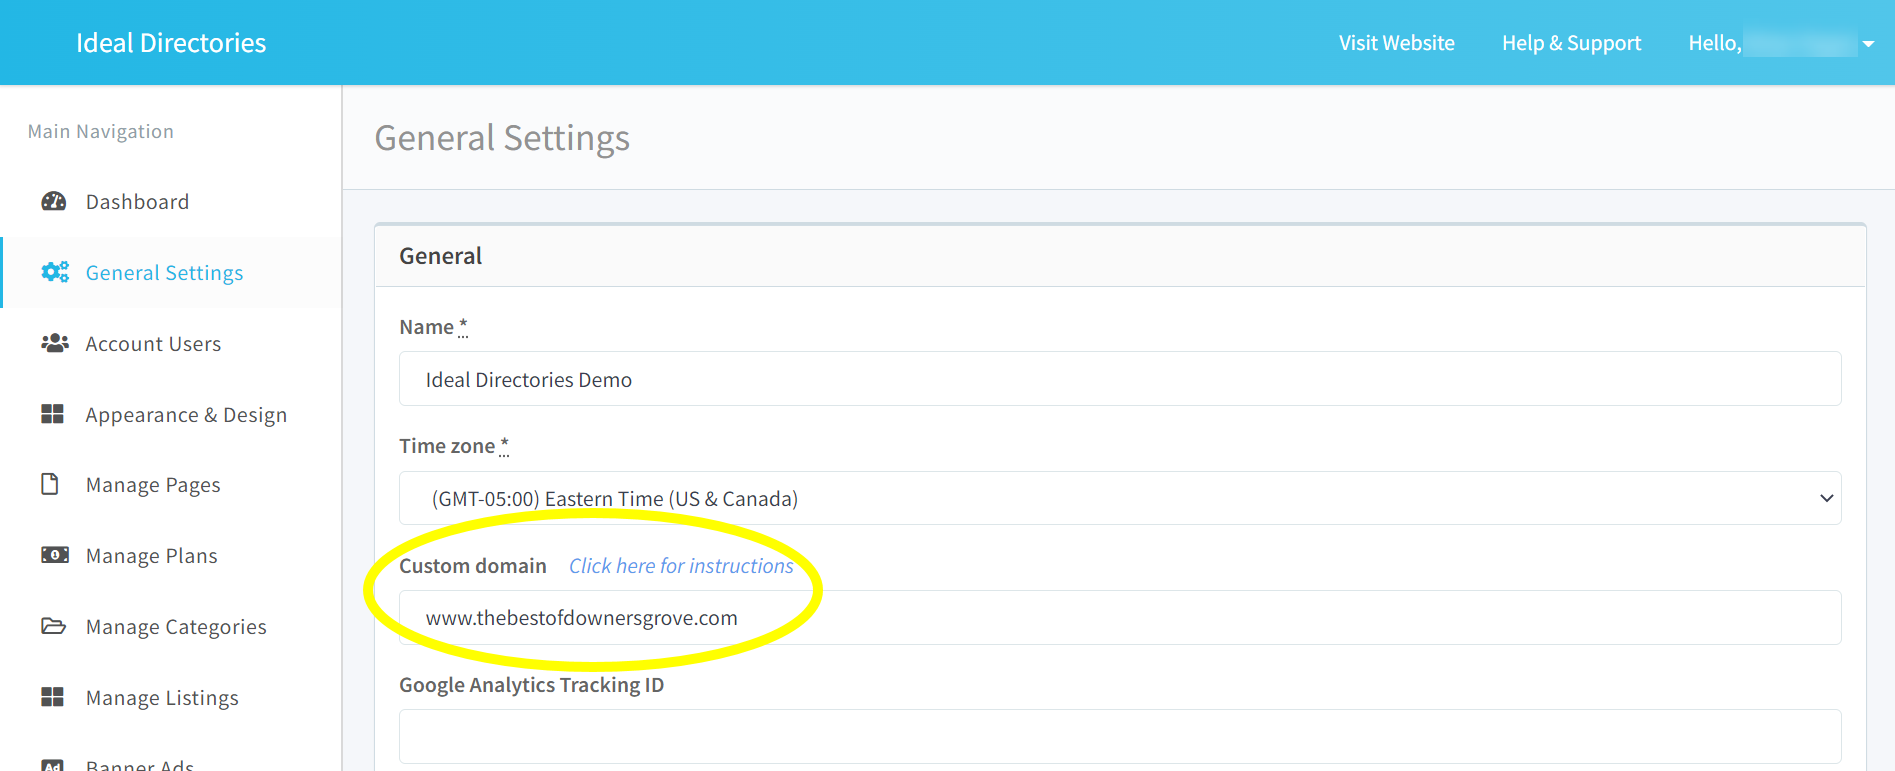
Once logged in to your dashboard, click General Settings on the left tool bar.

STEP 8 - Assign the Domain Name
On the General Settings screen, enter the domain name in the Custom domain field and click the "Save" button on the bottom of the page. Be sure to include “www” in front of the domain.
Please note: It may take up to 72 hours for the change to fully take place so if the site does not load immediately, please give it some time.

NOTE: You do not need to change your domain's nameservers, only the CNAME Record and A Record. You also do not need to purchase any hosting services for the domain.
Comments
0 comments
Article is closed for comments.